-->
Showing posts with label crafts. Show all posts

Tuesday, June 10, 2014

2014 Etsy Craft Party


Every year, thousands of crafters across the world get their craft on, together, at the annual Etsy Craft Party. This year's theme was Recapture: bring new meaning to your photographs.  


My local party was hosted by the SC Etsy Team, and was held at Due South Coffee located at Taylors Mill Properties in Taylors, SC.  
photos courtesy of Plate of View, Town, Molly Waits, Sweet to the Soul


I'd brought along some photos of my mom, not really knowing what exactly we would be doing with our photos.  Turns out the project involved embroidering our photos.  After thinking about it for a few minutes, I decided  just couldn't do that to these photos.  While I love the idea of adding some spunk to old photos, these just mean too much to me.  Luckily, our hosts provided an alternative project; decorating coffee mugs with paint pens.  


I absolutely can't draw, but I can doodle. Here's my finished mug. 


My friend, Sarah, was wise enough to bring some old candids she found in an antique shop, and her finished project was really great!  Here she is, stitching away on a photo that has been the topic of much discussion about it's subjects.  Who were they?  Best friends?  Sisters?  What happened to them? Are they still alive?  Did they remain friends?


Our fellow Etsians/crafters stitching away. 


The mill where the coffee shop is located, is home to many local artists' studios, and so they host a First Friday on the first Friday of every month. This one coincided with the craft party.  Many of the First Friday attendees stopped by the coffee house, and I was pleasantly surprised at the number of them who came up to the various (craft) tables, curious about what we were doing. It was nice to see that there's such a big interest in the crafting movement.  

I really had a great time at the party.  I met some new people, and I fell in love with a coffee shop located in an old Southern mill.  I can't wait for next year!


Until next time...


Monday, June 2, 2014

Weekend Garden Craft Party

I hope everyone enjoyed their weekend!  I sure did!

On Saturday, I hosted a garden craft themed craft party, and it was really a lot of fun!  We ended up making mosaic stepping stones, and considering none of us had made stones before, I think we did a pretty good job!  

I started thrifting for items to use for molds and for the mosaics about a month ago.  I also ordered some really pretty scrap glass from Etsy.  Until that morning, when I set all of supplies out together, I didn't realize just how much stuff I'd collected.


While we sat around the table, eating yummy food, there was a lot of discussion about breaking some of the nicer dishes.  All along, I'd thought I'd have a hard time breaking perfectly good dishes, but I was wrong.  It was fun!!


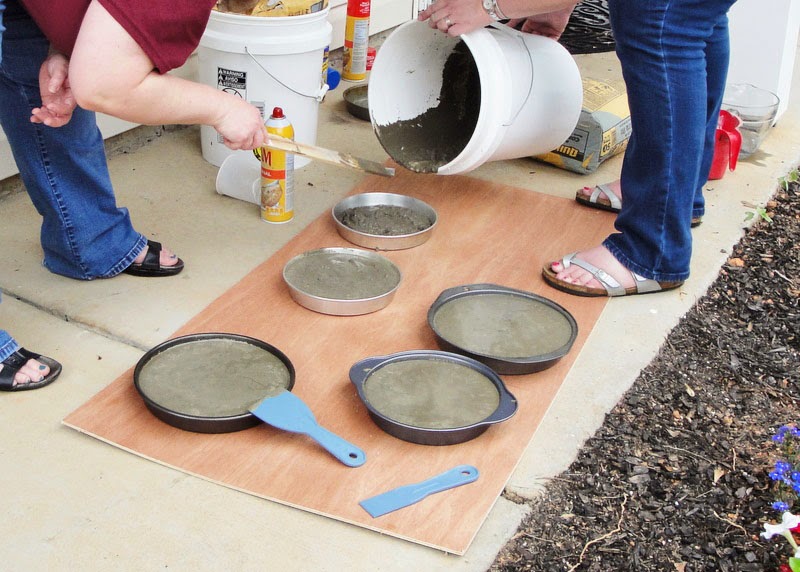
While some of us were doing the fun part, Sarah and Amy graciously prepared the concrete and molds.  I read that it's important to use cooking spray if you're using cake pans as molds.  It's supposed to make it easier to get the stone out of the mold, but I can't verify that yet since ours are still curing.  We have to wait 5 days!  Seriously, that is such a long time to a crafter.  I think most of us are definitely instant gratification type gals so 5 days is like 5 months in craft time.


I was still working away on mine when most everyone left so I never stopped to take photos of their stones, but here's mine.  I used some of the pretty china I'd been collecting.  I figured using it to make something pretty was better than just having it stacked on some shelf, where it isn't being seen.


When I was planning this party, I pinned all kinds of gorgeous mosaic stones, thinking I'd do some crazy elaborate piece.  Well, I found out that it's not that easy.  It took me forever to cut up my pieces.  It's really hard to fussy-cut glass!  In the whole time that everyone else made at least 2 stones, I was still cutting!  I know now that I should have all of my pieces cut out in advance.  By the time I started placing my pieces in the cement, it had already started setting so I wasn't able to push my pieces down as much as I'd have liked.  I'm planning to go back over the piece with grout to help cover up some of the sharp edges. I'm still pleased with how it looks so far though, and I can't wait to make more.

Have any of you ever done mosaics?  Do you have any tips to share?  I'd love to know some better ways for cutting china.  


Until next time...


Tuesday, September 25, 2012

DIY - Faux Antiqued Pumpkins


It seems like you can always find inexpensive foam pumpkins in all the craft stores.  There are oranges, browns and even greens (I guess those are technically squashes), but never white.  I can never find cheap small white pumpkins.  This year, I decided to do something about it.

I bought a collection of various foam pumpkins.  The larger ones, which I haven't finished yet, I got at Target for $2 each.  The smaller ones came from Big Lots at a buck each.  Wal-Mart also has the small pumpkins for about the same price.  I was in Michael's today and they have their Fall decor items on sale this week.  Basically, there's no shortage of these cheap pumpkins.


So you take your pumpkins, and gather the following:
  • brown craft paint
  • antique white craft paint
  • crackle medium
  • glaze

Directions:
  • Paint a couple of thin coats of the brown craft paint onto your pumpkins and let them dry.
  • Following the directions on your crackle medium, apply crackle.
  • Next top coat with the antique white.

After pumpkins have completely dried, do another coat of antique white.  Do this until you like the look you have.  Alot of my cracks were filled in, but there were just the right kind of crack let after my third coat.  The reason I didn't stop at one coat is because if  you brush the first topcoat over the glazing medium too hard, you'll smudge it and it won't look so pretty.  I tried two different crackle mediums, one that you let dry completely before you brush on the topcoat, and one that you just let dry until tacky before brushing on the topcoat, and they both smudged in spots.  The extra topcoat layers hide this.

Once your final topcoats have dried, it's time to glaze.  See here for my glazing tutorial.  

After you've glazed, you might want to go back and paint your stems.  I just used my brown craft paint on mine.


Here's a close-up of my finished pumpkins.


 These beauties are great for a neutral Fall look and for Halloween.


Linking to:
Wow us Weds
Creative Spark 
Made by Me
DIY Fall Festival
Sugar & Spice 
Hookin' Up With HOH
Liz Marie


Sunday, December 4, 2011

Nursery Crafting

Well, I'm still alive, and still baking this little bun. We've got about 10 weeks until her debut, and I'm just putting the finishing touches on her room.

Today, I want to share her mobile with you.


I'd planned on making one from the beginning, I just couldn't figure out what I wanted. I shared one type of mobile with you all, months ago. I actually started making that one, but of course, as soon as I found out I was having a girl, my nursery plans changed. Out went the gender-neutral room, and in came the floor to ceiling girly room.


I ran across this mobile a sometime back in late summer, and decided I'd give it a shot, even though, it seemed to be pretty time-consuming.  

Following this link will take you to The Handmade Home, and to the tutorial for the mobile.  I'm just gonna run through a few tidbits on how I made mine.


********

First off, this wasn't nearly as time consuming as I thought it'd be.  It's the perfect TV project.  Since I started knitting, nearly 10 years ago, I have the hardest time just sitting and watching TV.  I absolutely HAVE to have something to keep my hands busy.  This project was great for that!  

Second, for a mobile, you can't beat the price.  I spent around $5 on this.  The only things I had to purchase were extra felt sheets, and the baker's twine I used for hanging. 

I used a few pieces of fabric on some of the rounds, but I found I liked the way all felt looked better.  It just really made the embroidery stitches stand out (it seems like I may have read this very same thing over at HH).

I found my baker's twine here.

I cut all of my circles by hand.  I traced around various household objects with a fabric pen and then cut everything out.  I used objects (spool of thread, small tape measure, suction cup) that had similar measurements to what Ashley recommended.  * Just so you know, I've added the Sizzix Big Shot she recommended to my Christmas list this year.  Fingers crossed that i get it!  I have so many plans for that machine (think garlands galore).
Our ceilings are 8ft so I didn't make my mobile nearly as long as the ones over at HH.  This means I didn't need quite as many rounds as she did.  I ended up doing 5 strands.  The 4 outside strands had 4 completed rounds on them and the center strand had 6.  I ended up using a total of 44 rounds. 

I used a 15" hoop, which I painted to coordinate with the rounds. 


********


One good thing about this mobile is that you can use it for years.  It's not really babyish, and would be fine in a child's room.  Shoot, Han is 13 and she wants one for her room.  


I'm hoping to be back to blogging more frequently, at least until Zoe arrives.  It's been a LONG time since I've tended to a newborn so I'm not exactly sure how much free time to expect.  My guess is, not much. 


Saturday, January 29, 2011

FINALLY Finished!

Today I'm sharing a project that I've been working on for about 2 weeks.  It's a magnetic fridge calendar that I made after being inspired by the ones that Jenn, from Clean & Scentsible makes. 

Here's my February calendar.


Because my studio is such a disaster, I ended up buying everything I needed for this.  Thankfully, I was able to get most of it on the cheap.  I got most of my stickers from the dollar bins at Target.  My chipboard letters that spell FEBRUARY also came from Target and were only 99 cents a pack.  They also had some cute packs of Valentine papers that I grabbed.  I found the bottle-caps at Hobby Lobby and I think they were about $6 for 25 or so. 


I bought some round wood chips to use for some of the spots.  They're usually a little over a buck for five or six of them, which isn't too bad, but since I'm planning on making one of these for each month, that might get a bit pricey.  Good thing I found one of these at Goodwill for $1.  SCORE!


Jenn has a list of supplies that you could use to make these and she's got a tutorial.  I might do one myself for the March calendar, but in the meantime, check Jenn's out.


Linking to:
SNS @ Funky Junk Interiors

Thursday, January 20, 2011

Copycat Craft - Valentine Cupcake Liner Topiary

I hope everyone is having a great week.  I sure am and I can't wait to tell you all about it tomorrow for Favorite Things Friday.  In the meantime, I wanted to share with you a craft that I copied last weekend.

It's the Valentine Cupcake Liner Topiary by Jen over at Craft-O-Maniac.  I'm sure you seen it 'cause it's been featured all over the place this week.

Here's my version.

C-U-T-E!!

Sadly, these two things and my Valentine Ribbon Wreath are the only V-day things I have.  I've been busy this week with the shop and haven't had any time to actually craft.  I've got supplied to make another of these a couple of other things.  Hopefully, I'll have a fun-filled crafting weekend and will be sharing more Valentine's Day stuff with you next week.

Don't forget to come back by tomorrow and link up to Favorite Things Friday!


Linking to:
Get Your Craft On @ Today's Creative Blog

Friday, December 3, 2010

Favorite Things Friday - No. 3

A couple of weeks ago, Han and I were at Target where she found a cheap felt advent tree in the Dollar Spot.  She thought it was the cutest thing and wanted one so that she could count down to Christmas.  How in the world was it that my almost-twelve-year-old had never heard of an advent calendar?  I had to do something about that and buying a cheap felt tree wasn't gonna cut it.

Because of her age, I didn't want to do the whole "treat for each day" thing.  I just wanted her to be able to count down.  The cutest way to do that would be for her to have a set of countdown blocks.  

Aren't they adorable???  This was one of the most fun Christmas crafts I've done.  It was so much fun deciding what papers to use and it was so gratifying to see the awkward looking block transform as I sanded the edges of the papers off.

I got my blocks from Michael's for 99 cents each.  I've also seen them at Hobby Lobby for around the same price.

I painted my blocks first and then followed these instructions for making the blocks.  Sadly, I do not have a cutter so I had to use stickers for my numbers.  Maybe I'll be using vinyl next year.  Fingers crossed.


Here are two of my favorite things from last week's link party.

This cinnamon and heart garland from Sarah @ Modern Country Style.
So cute and I bet it smells amazing!


Next up are these amazing DIY vintage Christmas blocks by Kaitlyn @ The Birds Nest.
These are up next on my list.  I can use the rest of  the stickers I had leftover from my countdown blocks.  I don't have sheet music, but I do have some vintage sheet music scrapbook paper that I got from Hobby Lobby.  Perfect!


If you were featured, please feel free to grab a button.


the speckled dog


OK, it's your turn.  What are some of your favorite things?


Rules:
There's really only one.  Please, please, please link back to the party so that others can join in.  Also, it'd be really nice of you if you could visit a few of the other linkups and leave a nice comment.


Linking to:

Monday, November 22, 2010

Copycat Craft - Holly Jolly Wreath

Uh, have you seen this most awesomely awesome Christmas wreath that Kristy from The Diary of Dave's Wife made???


How cute is that???  It's so cute that I immediately replaced my Christmas Ribbon wreath with one.  I moved the ribbon wreath to Han's bedroom door and am now proudly displaying my Holly Jolly wreath on the front door.  I had everything I needed to make this except for the hanging ribbon so that just makes this wreath even more awesome.

Because of the kind of wreath form I used and the way I wrapped the yarn, mine looks a little like a SOS float or whatever those things are called.  I like to think that once it got it's holly leaves and berries, that it looks like a peppermint now. 

Here is my version of the Holly Jolly wreath.


Linking to:
Three or More Tues @ The Gypsy's Corner
Whatever Goes Weds @ Someday Crafts
Strut Your Stuff Thurs @ Somewhat Simple 
Sunday Showcase Party @ Under the Table and Dreaming

Wednesday, November 17, 2010

Cheater Yarn Balls

I started my blog in January.  By then, it was too late for me to share my Christmas decorations.  I've had to wait over 10 months to show these.  


I'd originally planned to make one of the yarn ball wreaths that Starbucks used a couple of Christmases ago. 
 image courtesy of Apartment Therapy


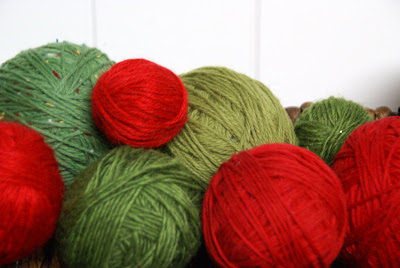
After wrapping foam balls in different red and green yarns, I decided that I didn't feel like dealing with trying to arrange and attach them to a wreath form so I ended up just tossing them in a basket, which I really liked.  I liked it enough to do the same thing with them this year.

Just like the Christmas Ribbon Wreath and the Ribbon and Yarn Trees, these yarn balls don't need a tutorial or instructions, really.  I'll just briefly explain what I did.  I've mentioned in  the past posts that I try not to use hot glue.  I can't stand those stupid strings of glue that form when you pull the gun away.  They annoy me to no end.  Anyway, I use straight pins when I wrap foam in something.  With these yarn balls, I used a good many pins throughout just to keep the yarn in place.  When you're wrapping these, you want to change directions every now and then and placing a pin right before you change directions will help you out.  You can just cover the pinhead by positioning a neighboring strand of yarn over it.


I also made these "snowballs" last year.  I had some fuzzy white yarn that I think came from Hobby Lobby and it makes the perfect snowball when wrapped around foam balls. 


I'm using a good bit of foam in my Christmas projects this year too.  I sure hope these things aren't toxic.  :-)


Linking to:
Sugar & Spice @ seven thirty-three
Hookin' Up With HOH 
Feature Yourself Friday @ Fingerprints on the Fridge
Three or More Tues @ The Gypsy's Corner  
Whatever Goes Weds @ Someday Crafts
Strut Your Stuff Thurs @ Somewhat Simple  
Show & Tell Sat @ Be Different, Act Normal 
Met Monday @ Between Naps on the Porch  
Get Your Craft On @ Today's Creative Blog  
Show & Tell Sat @ Be Different, Act Normal 
 

Monday, November 15, 2010

Kids' Crafts - Holiday Houses

I love getting Han involved with the Christmas crafting that goes on around here. This weekend, she had a friend stay over and we worked on several things. This was the major project they worked on.
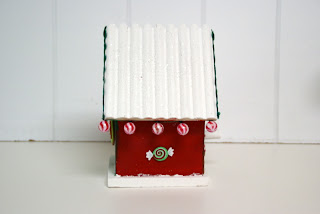
Han's house is on the left and bud's is on the right


Cute, right? I'd love to do one like a gingerbread house.

Supplies:
  • bird houses
  • crafts paints

Optional supplies:
  • dimensional holiday stickers
  • mini ornaments
  • glitter
  • glue gun
  • spray glue
  • pipe cleaners
  • pom poms
  • ric-rac
  • ribbon


I'd like to suggest Hobby Lobby for everything. I only say this because you can get everything you need there.  They have an awesome mini tree section and that's where we found the wreaths and peppermint balls.  I bought that stuff on Friday and it was 50% off. 

They did everything themselves.  I supervised over the hot glue.  (ug)

It's hard to see, but we sprinkled clear glitter on the roof as snow.  It looks great in person. 
  Han's house

her bud's house


Han has a tree in her room and her ornaments are fuchsia, turquoise and bright green so she painted this mini house in those colors and embellished with some matching stickers and buttons.  I'm planning to have Charles add a screw-hook so that she can use this as an ornament.


Linking to:

Friday, November 12, 2010

Foam Tree Crafts


Did you know that the Dollar Tree carries this size of the foam tree forms?  I happen to think this is totally awesome because that foam stuff is expensive!  I try to use a coupon when I'm buying it from one of the big ole craft stores.

Anyway, I wanted to share some of my little trees with you today.  The only things I had to purchase for these were the pom poms and the tree forms.  Isn't it awesome to be a crafter?  How many times have you been able to throw a last minute school project together with stuff you had lying around?  Please tell me I'm not the only one who has a child that waits until the last minute to let me know that she's got a project due like, TOMORROW.  


For these trees, I used the leftover ribbon I had from the Christmas Ribbon Wreath.  Like I mentioned in that post, I HATE using hot glue (those dang strings!) so I used pins to hold everything in place.  What's great about this is that you can reposition things until you get them just right.  This also means that the backs of your trees will look like this.


I'm cool with this because it means I don't have to deal with hot glue.  I did, however, have to use hot glue to attach the pom poms to the top of the tree.  The other day, when I was at AC Moore, I saw that they'd made some ribbon trees similar to these only they used those itty bitty foam balls, coated in glitter, instead of pom poms.  I have to say that I really liked they way that looked.  If I hadn't already made mine, I'd have done that.  Another good thing about using those foam balls is that they can be stuck to the top of the tree with a straight pin.  No hot glue! 


I made these yarn trees last year (they didn't have pom poms until this year) with some scrap yarn, some buttons (hot glue, ick), some sequins and some beads.  The tree on the right has red beads with red sequins under them, pinned onto the tree.  Cute!

We're working on Christmas crafts this weekend so look for a flurry of Christmas craft posts next week.  

Oh, have I mentioned how much hate hot glue???


Linking to:
Fab Friday @ Frugal & Fabulous Design
Frugalicious Friday @ Finding Fabulous 
Saturday Nite Special @ Funky Junk Interiors
Weekend Wrap Up Party @ Tatertots and Jello  
Crazy Christmas Crafter @ i heart naptime 
Show and Tell Sat @ Be Different, Act Normal
Handmade Holidays Hooplah @ Just a Girl
Get Your Craft On @ Today's Creative Blog
Sugar & Spice @ seven thirty-three
Whatever Goes Weds @ Someday Crafts
Show & Tell Sat @ Be Different, Act Normal 
 

Thursday, November 11, 2010

Christmas Ribbon Wreath

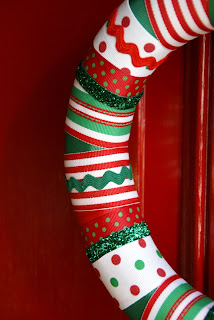
I loved the Halloween Ribbon Wreath so much, I just HAD to make one for Christmas.  I made this one way back at the beginning of Oct and have been dying to hang it up.  I might just have to start sneaking the Christmas goodies out early.  And by early, I mean T-O-D-A-Y.


I'm sure that you can tell by looking at this, how to make it so I won't post instructions.  I will say that I loathe hot glue and do my best to avoid using it and so when I'm wrapping foam in something, I use straight pins to keep everything in place.  

* To see what I did with my leftover ribbon, click here.


Linking to:
Thrilling Thursday @ Paisley Passions
Transformation Thursday @ The Shabby Chic Cottage 
Frugal Friday @ The Shabby Nest 
Feature Yourself Friday @ Fingerprints on the Fridge 
Frugalicious Friday @ Finding Fabulous
Fab Friday @ Frugal and Fabulous Design  
Saturday Nite Special @ Funky Junk Interiors
Weekend Wrap Up Party @ Tatertots and Jello 
Crazy Christmas Crafter @ i heart naptime 
Show and Tell Sat @ Be Different, Act Normal
Market Yourself Monday @ Sumo's Sweet Stuff
Making the World Cuter Monday @ Making the World Cuter 
Handmade Holidays Hooplah @ Just a Girl
Motivate Me Monday @ Keeping it Simple
Get Your Craft On @ Today's Creative Blog
Sugar & Spice @ seven thirty-three
Make it Yours Day @ My Backyard Eden 
Three or More Tues @ The Gypsy's Corner
Whatever Goes Weds @ Someday Crafts
Strut Your Stuff Thurs @ Somewhat Simple 
Show & Tell Sat @ Be Different, Act Normal 


Wednesday, November 10, 2010

Mousie Walnut Ornaments from Clover Lane

When I left my job and became a stay-at-home last Dec, I really ramped up my blog reading.  I mean, all of a sudden, I had all of this free time.  What better way to spend it than being nosy and reading about other people's lives, right?

One blog I discovered, Clover Lane, I found on Today's Creative Blog sometime in late Dec or early January and I've been reading ever since.  When Sarah first posted these adorable ornaments, I bookmarked them immediately.  How cute are these???

images courtesy of Clover Lane


These are so on the list for this weekend's holiday crafting projects!

You can find the tutorial for making them here.  


Monday, September 27, 2010

Boo to You

I got this frame from GW a few weeks ago for $1.  

Even though there was no glass, I was planning to paint it a pretty aqua color with maybe a black wash to accentuate the details.  But then I started doing Halloween projects.  In the end, I turned they kinda ugly green frame into this cute Halloween sign.

I painted the frame, covered one side of the cardboard with scrapbook paper and then made cutouts of the letters and glued those on.  Then I used one of these (finally, I used one!) to finish it off.

Cute, cute, cute!!

Linking to:
Met Monday @ Between Naps on the Porch
Market Yourself Monday @ Sumo's Sweet Stuff 
Making the World Cuter Monday @ Making the World Cuter
Craft-O-Maniac  
Anti-Procrastination Tues @ New Nostalgia 
DIY Project Parade @ The DIY Showoff  
Get Your Craft on Tues @ Today's Creative Blog 
Make It Yours Day @ My Backyard Eden 
Upcycled Awesome @ The T-Shirt Diaries  
Show and Tell @ Blue Cricket Design 
Whatever Goes Weds @ Someday Crafts  
Under $100 Linky Party @ Beyond the Picket Fence 
Halloween Week @ Somewhat Simple   
Fall Link Party @ Tatertots & Jello 
Feature Yourself Friday @ Fingerprints on the Fridge