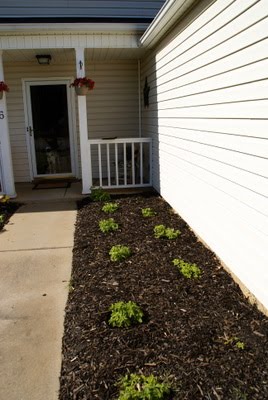
I hope everyone enjoyed their weekend! I sure did!
On Saturday, I hosted a garden craft themed craft party, and it was really a lot of fun! We ended up making mosaic stepping stones, and considering none of us had made stones before, I think we did a pretty good job!
I started thrifting for items to use for molds and for the mosaics about a month ago. I also ordered some really pretty scrap glass from Etsy. Until that morning, when I set all of supplies out together, I didn't realize just how much stuff I'd collected.
While we sat around the table, eating yummy food, there was a lot of discussion about breaking some of the nicer dishes. All along, I'd thought I'd have a hard time breaking perfectly good dishes, but I was wrong. It was fun!!
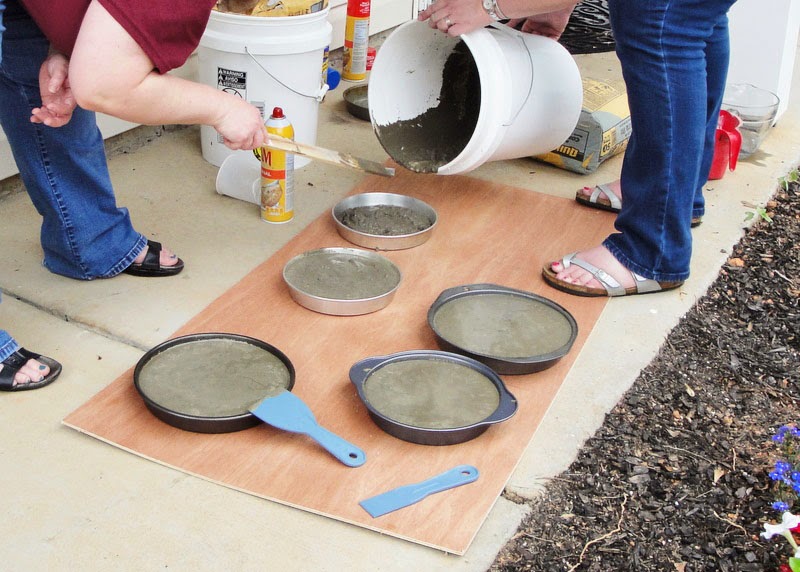
While some of us were doing the fun part, Sarah and Amy graciously prepared the concrete and molds. I read that it's important to use cooking spray if you're using cake pans as molds. It's supposed to make it easier to get the stone out of the mold, but I can't verify that yet since ours are still curing. We have to wait 5 days! Seriously, that is such a long time to a crafter. I think most of us are definitely instant gratification type gals so 5 days is like 5 months in craft time.
I was still working away on mine when most everyone left so I never stopped to take photos of their stones, but here's mine. I used some of the pretty china I'd been collecting. I figured using it to make something pretty was better than just having it stacked on some shelf, where it isn't being seen.
When I was planning this party, I pinned all kinds of gorgeous mosaic stones, thinking I'd do some crazy elaborate piece. Well, I found out that it's not that easy. It took me forever to cut up my pieces. It's really hard to fussy-cut glass! In the whole time that everyone else made at least 2 stones, I was still cutting! I know now that I should have all of my pieces cut out in advance. By the time I started placing my pieces in the cement, it had already started setting so I wasn't able to push my pieces down as much as I'd have liked. I'm planning to go back over the piece with grout to help cover up some of the sharp edges. I'm still pleased with how it looks so far though, and I can't wait to make more.
Have any of you ever done mosaics? Do you have any tips to share? I'd love to know some better ways for cutting china.
Until next time...
Showing posts with label gardening. Show all posts
Monday, June 2, 2014
Tuesday, May 13, 2014
My Mother's Day
I hope all of my fellow moms had a great Mother's Day!
We had a pretty productive weekend. I'd decided for Mother's Day, instead of gifts, that I wanted to plant flowers. It'd been something like 5 years since I'd done anything like that. Aside from two azaleas and a knock-out rose tree, there was no color happening in our yard. Saturday afternoon, we headed to Lowe's and loaded up.
After breakfast Sunday morning, we headed outside, and got started. This is where we were about half-way through.
I ran back out to Lowe's for more supplies.
We were out there for hours, and I'd forgotten how much I love being out in the yard, working. We still have a few more flowers to plant, and then we need to mulch. I'll share some photos of everything once it's all done.
I got some sewing done this weekend too. Saturday afternoon, I started on a little sampler quilt from some of my leftover Scrumptious squares. I had to stop because I ran out of the cream fabric, and had to order more. I ordered another layer cake of Scrumptious too because I really just love it so much!
Sunday night, I started on a string quilt, using a box of scraps.
Here's to hoping I get something finished soon! Until next time...
Tuesday, June 1, 2010
Lantana
This is by far the easiest thing I've grown, which makes it one of my favorite plants. I wanted to do a post on it because it's really just amazing to me. This is a really great plant for anybody that needs something low maintenance.
We moved into our house three years ago and decided to tackle the beds after being here for a year. We had two beds out front, one in front of the porch and one beside the garage. Since I'd never done any gardening before, I really just wanted one bed to focus on. I decided to focus on the porch bed and to plant only Lantana in the bed beside the garage (I'd read that it was pretty low maintenance). I bought 11 little plants for $2 each. They did well the first year, but last year... oh my gosh! They grew so big, so fast with very little water. They're drought tolerant which means you can skip watering a lot. Seriously, I may have watered them three times the whole summer. All you really need to do is prune them. You'll need to do this several times because they grow fast!
Go here for more info on Lantana.
I'm in Zone 7 so this will come back each year. We cut it down in the fall, leaving about 1 or 2 inches of the branches. The year before last, we left them exposed and last year, we covered them with mulch. They seem to be growing faster this year, but I'm not sure if it's because we mulched them or not. They start sprouting in April, blooming in May and they continue to bloom until the end of Sept/beginning of Oct. We cut them back in Oct.
April 10th
If you look really close, you can see Dax at the door. Hi, Dax!
April 21st
April 30th
May 14th
They're starting to flower.
Pretty, huh?
May 26th
You can see that it's starting to take over the walkway. Charles, where are you?
May 30th
More flowers popping out.
Close up of the flowers:
I think the variety that I have is called Fruit Punch. I'm not 100% on this, but I think maybe the growth rate depends on the variety you have. I have a red and orange variety that grows slower than the Fruit Punch and they're all in the same bed. I also have some lavender colored at my mailbox that doesn't get very big at all. A neighbor has solid yellow which also doesn't seem to get very big.
Friday, April 23, 2010
Terrariums
So I've been picking up these glass containers at Goodwill whenever I run across them.
I also found this Ball jar that's older than I am, for a quarter.
I've been planning to make some terrariums for awhile and I thought these would be perfect. I went all around, getting my supplies and picked out small plants that I thought would be suitable. After I began my layering, I quickly realized that the containers were going to be too small and I wouldn't be able to get the lids on. I'm doing this in my kitchen so I don't really want to leave everything and go look for more containers. Also, that kinda defeats the purpose of trying to be thrifty. In the end, I managed to make two enclosed terrariums with only a little Irish moss in them. And one open terrarium (I used a glass bowl from the coffee table that was holding potpourri). The others, I decided to treat as flower pots. I do like the way they all turned out, but I'm a little disappointed that I didn't get the full look I was going for.
And the baby got marbles.
I also found this Ball jar that's older than I am, for a quarter.
I've been planning to make some terrariums for awhile and I thought these would be perfect. I went all around, getting my supplies and picked out small plants that I thought would be suitable. After I began my layering, I quickly realized that the containers were going to be too small and I wouldn't be able to get the lids on. I'm doing this in my kitchen so I don't really want to leave everything and go look for more containers. Also, that kinda defeats the purpose of trying to be thrifty. In the end, I managed to make two enclosed terrariums with only a little Irish moss in them. And one open terrarium (I used a glass bowl from the coffee table that was holding potpourri). The others, I decided to treat as flower pots. I do like the way they all turned out, but I'm a little disappointed that I didn't get the full look I was going for.
Here they are.
Here's the one in the glass bowl.
If you're insterested in making your own terrarium, go here.
Of course, Martha has some info too.
Linking to:
Featured at:
Monday, April 19, 2010
DIY Beaded Garden Stake
These are super-duper easy to make. And cheap too!
What you need:
green coated garden stake
drawer knob
glass beads
pliers, saw or wire cutter
I use the Mass O Glass beads because there's a good mixture of beads and most of them have holes that are big enough for the garden stake. If you use these, you might want to buy two tubs because there are some beads in there with small holes. I suppose you could strip the green coating from the garden stake to make it thinner.
The garden stake should have a little bump up next to the circular end. The circular end becomes the bottom of the stake and that little bump will hold the beads on the stake. You can use pliers to straighten the circular end or you can use a saw or wire cutters to cut it off. The latter is much easier.
Once you have a straight "bottom", slide your beads on and top with the drawer pull.
That's it!
** I've had these two out for two years and they're still lookin' good!
*Edited to add that I got my beads at Michael's. I think they were around $3 a tub. I'm going to Hobby Lobby today and I'll check to see if they have them there. I'm not sure if AC Moore has them or not and we don't have a Joann's around here so not sure about that either.
* No Mass of Glass at my HL.
Linking to:
Sunday Showcase Party @ Under the Table and Dreaming
Weekend Wrap-up Party @ Tatertots and Jello
Metamorphosis Monday @ Between Naps on the Porch
Sundae Scoop @ i heart naptime
Made by You Monday @ Skip to My Lou
Making the World Cuter Monday
Nifty Thrifty Tuesdays @ Coastal Charm
DIY Day @ A Soft Place to Land
Get Your Craft on Tuesday @ Today's Creative Blog
Toot Your Horn Tuesday @ A Silly Little Sparrow
Talented Tuesday @ My Frugal Family
Whatever Goes Wednesday @ Someday Crafts
A Little Craft Therapy @ Life in the Pitts
Make it Yours Day @ My Backyard Eden
Transformation Thursday @ The Shabby Chic Cottage
Frugalicious Friday @ Finding Fabulous
Featured at:
Subscribe to:
Posts (Atom)