-->
Showing posts with label decorating. Show all posts

Monday, May 26, 2014

Master Bedroom

The last time I mentioned this space was nearly three years ago, so I figured it was about time for me to share it with you, and finally show what I ended up with.

When we found out I was expecting (has it really been three years???), we knew immediately that we'd be moving upstairs so we could be close to the baby's room.  We chose the two bedrooms that were at the far end of the hall, side by side.  At the time, one of the rooms was my husband's studio/office and the other was Han's room. We moved my husband's space downstairs to the master, and we moved Han into what was the spare room.  


The new room is a good bit smaller than the previous room, but the furniture fits so much better!  The actual master bedroom doesn't have one full wall. All of the walls either have a window or a door so the furniture could really only be arranged one way, and that we didn't have a place for anything extra, like a chair or console table.  The new room might be a little tighter, but we have room for more than the bed, dresser and bedside tables.  

For the wall color, I decided to go with a neutral color, and chose a Better Homes and Gardens color called Creamy Pebbles.  I've been really happy with the color and I'm glad I chose a neutral because it'll make it easier for me to make some changes to the decor (new bedding, wall decor, etc) which is something I'm in the process of doing.

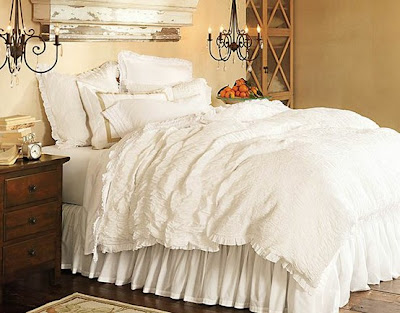
I kept the same drapes, and bedding I'd been using downstairs. and bought new bedding from Pottery Barn.  The bedding looks great with the wall color, and blends with the drapes.  


I absolutely love my bedroom!  I love being in there.  Not only is is pretty, it's so quiet!  It really is a sanctuary for me.  


As I mentioned earlier in the post, I'm in the process of planning an update to the room.  I've got the bedding, but am still trying to make up my mind on drapes and wall decor.  Hopefully soon I'll have a new room to share.  

Until next time...


Friday, April 6, 2012

Information Station


If you followed this blog last year, you may remember this space.


I loved that look, but it just didn't flow with the rest of our downstairs (we have an open floor plan) which to me mimcs the Pottery Barn look; lots neutrals and unique accessories.  Sometime last year, I pinned this photo to my Entryways board.  It was the inspiration photo for my new space.


The T was one of those gold letters from Hobby Lobby.  I just spray painted it.  The clock, calendar, mail pocket, bulletin board and fake plants all came from Target.  The "HOME" plaque came from Hobby Lobby.  The key and rusted number sign were thrifted.  I just love that number sign!

Underneath all of this, I have a small table that I thrifted for $8.  It used to be an ugly brown sewing table, but I painted it black with a couple of cans of spray paint.  The basket under the table is for shoes.  We used to just kick our shoes off here and leave them in the floor, but now they're neatly corralled in the basket. 

Monday, April 2, 2012

A Room for Zoe

I've finally gotten around to taking photos of her room.  Of course, these days it has that "lived in" look so I had to do some staging to get the good photos.  You know, the ones I should have taken before she was born. 

I'd planned on a gender-neutral room right up until I found out I was having a girl.  Once I knew a girl was in our future, those nursery plans went out the window.  We already had an over-sized red chair that I knew I'd be using in the nursery so I basically had to design the room around that. 


The paint color we used is a Valspar (Lowe's) color called Sea Air.  I made the curtains from some inexpensive fabric from Hobby Lobby.  I posted about the mobile here (I'm actually in the process of making a smaller one to hang over the changing table).  I kept the bedding simple and only made a rag quilt for it.  The print came from the Etsy shop, a little sweetness.


Aside from the crib, this changing table was the only other piece of furniture we had to purchase.  The crib and the changing table are both from Target.  The mirror you see here also came from Target.  Lucky for me, my sweet Zoe was born in Feb so I was able to find these red and white fabric baskets, in the Wal-Mart Valentine's Day section, to use for storage.  The piggy lamp used to belong to Han.  Its shade was lost long ago so I bought a plain white one and glued some ric-rac on it.

The dresser belonged to Han and  the hutch came with another dresser I thrifted just the week before I found out I was expecting.  Perfect timing!  You can't really see it, but there is a photo of my mom on this dresser (look for it at the end of this post).  She passed away 4 weeks before Zoe was born.  This was also the photo I had in the delivery room with me.  My mom was there for me when Han was born, and she was there with me when little Z came into this world.


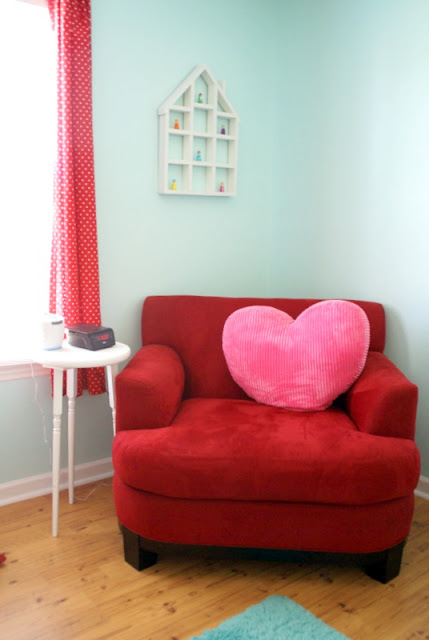
Here's the chair the room was designed around.  The pillow came from Target and was another lucky Valentine's Day find.  The side table was made by Charles back when we did Han's first room makeover .  By the way, Zoe's room is the same room that was made over in that post.  Han got moved to another room so we could use this room for the nursery. 

This little shelf, that hangs over the red chair was something I thrifted a few years ago.  It was in the master bedroom until we moved that room up next to the nursery room.  The little peg people came from the Etsy shop, mooshoopork.  She doesn't have any available now, but you can ask for a custom order.  That's what I did.  I'd pinned them and by the time I was ready to buy them, they'd sold.
The shelf over the cubes was one I'd thrifted a couple of years ago.  Seems it was just waiting for Zoe.  A coat of white paint, and it was perfect.  The lamp was a plain one I bought at Target.  I added the red ric-rac and used this tutorial for the fabric rosettes.  The abacus and the vintage Fisher Price cash register were thrifted back before my niece was born in 2010.  I'd planned to give them to her, but didn't for some reason.  I LOVE that cash register.  My sister and I had one when we were kids. 
The Etsy shop, mooshoopork, also sells these adorable plaques.  She didn't have any listed when I bought the peg people from her, and so I just ended up making my own since it seemed simple enough. 
Isn't it adorable?.

We found this cute little rocking chair in an antique shop last Fall.  The smaller Raggedy Ann was thrifted sometime before I knew I was expecting.  I just love Raggedy Ann, and had to have her.  Once I bought the rocker, I bought the larger, newer Raggedy Ann to keep her company.


Well, I guess that's it.  I didn't do a whole lot of crafty, decorative things while I was pregnant, but I did a few room makeovers that I'll be sharing in the next few weeks.  I'm hoping to get back into blogging on a regular basis.  Pregnancy just zapped any energy and creative ambition I may have had.  Thanks to those of you who still have me in your readers!  I was pleasantly surprised at the comments I received on my Zoe post earlier today.  


I love you , Mama!! 
taken at my wedding reception lunch on 6/22/08


Linked to:
Anti Procrastination Tues @ New Nostalgia
Get Your Craft on @ Today's Creative Blog 
One Project at a Time @ A Bowl Full of Lemons 
Take a Look Tues @ Sugar Bee Crafts
Creative Spark @ Clean & Scentsible
Be Inspired @ Elizabeth & Co 
Wow us Weds @ Savvy Southern Style 
Power of Paint Party @ Domestically Speaking
Sugar & Spice @ seven thirty-three  
Transformation Thurs @ The Shabby Creek Cottage 
Fridays Unfolded @ Stuff and Nonsense
Show and Tell Friday @ My Romantic Home  
Creative Things Thurs @ The Vintage Farmhouse 
Free for All Friday @ Sassy Sites  
Frugal Friday @ The Shabby Nest 
Frugalicious Friday @ Finding Fabulous 
Weekend Wrap-up @ Tatertots & Jello 
Whatcha Got Weekend @ Lolly Jane Boutique  
Show & Tell Sat @ Be Different, Act Normal 
Met Monday @ Between Naps on the Porch 

Sunday, December 4, 2011

Nursery Crafting

Well, I'm still alive, and still baking this little bun. We've got about 10 weeks until her debut, and I'm just putting the finishing touches on her room.

Today, I want to share her mobile with you.


I'd planned on making one from the beginning, I just couldn't figure out what I wanted. I shared one type of mobile with you all, months ago. I actually started making that one, but of course, as soon as I found out I was having a girl, my nursery plans changed. Out went the gender-neutral room, and in came the floor to ceiling girly room.


I ran across this mobile a sometime back in late summer, and decided I'd give it a shot, even though, it seemed to be pretty time-consuming.  

Following this link will take you to The Handmade Home, and to the tutorial for the mobile.  I'm just gonna run through a few tidbits on how I made mine.


********

First off, this wasn't nearly as time consuming as I thought it'd be.  It's the perfect TV project.  Since I started knitting, nearly 10 years ago, I have the hardest time just sitting and watching TV.  I absolutely HAVE to have something to keep my hands busy.  This project was great for that!  

Second, for a mobile, you can't beat the price.  I spent around $5 on this.  The only things I had to purchase were extra felt sheets, and the baker's twine I used for hanging. 

I used a few pieces of fabric on some of the rounds, but I found I liked the way all felt looked better.  It just really made the embroidery stitches stand out (it seems like I may have read this very same thing over at HH).

I found my baker's twine here.

I cut all of my circles by hand.  I traced around various household objects with a fabric pen and then cut everything out.  I used objects (spool of thread, small tape measure, suction cup) that had similar measurements to what Ashley recommended.  * Just so you know, I've added the Sizzix Big Shot she recommended to my Christmas list this year.  Fingers crossed that i get it!  I have so many plans for that machine (think garlands galore).

Our ceilings are 8ft so I didn't make my mobile nearly as long as the ones over at HH.  This means I didn't need quite as many rounds as she did.  I ended up doing 5 strands.  The 4 outside strands had 4 completed rounds on them and the center strand had 6.  I ended up using a total of 44 rounds. 

I used a 15" hoop, which I painted to coordinate with the rounds. 


********


One good thing about this mobile is that you can use it for years.  It's not really babyish, and would be fine in a child's room.  Shoot, Han is 13 and she wants one for her room.  


I'm hoping to be back to blogging more frequently, at least until Zoe arrives.  It's been a LONG time since I've tended to a newborn so I'm not exactly sure how much free time to expect.  My guess is, not much. 


Saturday, August 13, 2011

Master Bedroom Inspiration

I may have mentioned that we're moving our bedroom from downstairs, to one of the bedrooms upstairs.  To make a short story long, as Leslie likes to say, we'll be switching Charles' music studio with the master bedroom.  His studio, is next to the bedroom that Han occupied until a couple of weeks ago.  We moved her down the hall and we'll use her old room for the baby.  The short version of this is, we want to be closer to the baby.


There were some other deciding factors in this, mainly that it's too loud on the main floor.  Not only do I hear every cricket living in the backyard, but our room shares a wall with the living room and as luck would have it, it's the TV wall.  Charles rarely goes to bed before I do, so when I do go to bed, it's like I'm trying to sleep in the living room.  Another plus to moving is there'll be no more lugging laundry up and down the stairs.  The laundry room will be right down the hall!  One last plus is that I'll get the whole closet (not a walk-in) to myself.  Charles will keep his clothes in his studio since he'll still be using the master bath (I'm now sharing a bathroom with Han.)


When we first began talking about the move, my first concern was as to how I would decorate the room (of course!).  I just finished the current master look in March, but it just felt odd to do another room exactly the same.  I looked around on Pinterest, and pinned a lot of photos, and decided that I basically wanted the same kind of style, but I'd just switch it up a bit.


The walls have been painted and I chose a Better Homes & Gardens (Wal-Mart) color called Creamy Pebbles.  I had it color matched at Lowe's in Valspar paint with and eggshell finish.  I found the color through Leslie from Goodbye House, Hello Home.  She used it in the bedroom that her foreign exchange student is staying in.  It's a beautiful room, so you should go check it out!  BTW, I don't think I've mentioned this before, but Leslie and I are friends IRL. We met through our blogs and found that we only live about 15 minutes away from each other!


Since Charles is still working on the new floors and trim, I obviously won't be sharing any photos of the room today, but I'd like to share some of the pins I have for inspiration.


Here's my Pinterest link to this board.  You can find the source for each photo by visiting the pin.


I'll most likely be using white bedding with neutral throw pillows.  I especially love the throw on this bed.  Pottery Barn has some that I love, but I was't really wanting to pay PB money for one.  I thought I'd make one myself, but after I totaled the yarn costs, I found that it would be just as expensive as buying one from PB.  I'll still check around to see if I can find a cheaper version, but since I'm not buying new bedding this time, I think we can maybe splurge on a throw (that baby can spit up on... ha!).


This wall color is similar to Creamy Pebbles, and I absolutely love this bedding!


Not sure if we'll have a bedside rug, but I do love this one!


I'd love to make some pillow similar to these for the bed.  If anyone know of a good tutorial, please let me know.


I thought something like this would look nice over the bed, but since we have a tall-ish headboard, I don't think it'll work.  I still like it, though!


I really like this plate arrangement.  I'm planning to move the green desk from our foyer into this room, and if we don't end up installing a TV in the wall over it, I'd like to hang some plates there.  This space is between the two windows in the room, and I think this piece of wall, with the plates on it, would look nice framed by the windows. 


I've got all of the pieces for this little set-up by Miss Mustard Seed and I thought that it'd look great on the desk.


I pinned several boxwood wreaths because I wanted to make one to hang in a large empty frame I plan on using.  I haven't been able to find faux boxwood stems anywhere, and finally just ended up doing a coffee filter wreath.  


I haven't made too many final decisions yet, as far as what will hang where, because I want to wait and see how furniture placement goes first.  This room is considerably smaller than the current one and so I'm not sure which of the two possible ways we'll be arranging the furniture.  Hopefully the transformation will be completed by midweek.  If so, I'll get started on everything that needs to be made and get a post up asap.


Hope everyone has a great weekend!

Saturday, July 30, 2011

Nursery Stuff

First off, I'd like to give a big thanks to those of you who left comments on my last post. I replied directly to those I could, but some of you have your e-mail addresses blocked.

I've decided to let Han do the room the way she wants since it's HER room, and not mine. I got several suggestions of painting the dresser lime green, which is one of the colors in the bedding, and I think we'll be doing exactly that (with Han's approval, of course!)  * Since I started this post, we've considered purchasing new furniture for her room.  She's almost 13 and I think it's about time she has an actual bedroom set.  We're planning to finish the rest of our renovations before we make such a large purchase, so until then, she's just using the yellow dresser.


Now on to the meat of this post.  I showed a couple of nursery idea boards last month and I mentioned that I'd probably end up changing my mind. I know myself so well. I think it was that same week that I decided I'd like to do a gender-neutral nursery.


I was inspired by this nursery from Susan Weinroth. So bright and cheery!


One thing I have to consider when designing this room is the chair we'll be using in there.  It's the big red chair from my studio that so many of you loved.


Considering the red chair, I thought it might look nice to have white walls and then uses pops of color around the room.  Kind of this like nursery that I found on Pinterest.  The source from the pin was from the boo and the boy , and she credits Spearmint Baby.  I looked through the featured nurseries there, but I couldn't locate this one so I'm not sure where it originated.  It sure is peppy though!


Once I got the general scheme down, I started thinking about accessories.  I blogged a few weeks ago that I'd started knitting/making a mobile similar to this one.


So far, I've knitted the band and started on the birds, which are currently wingless, with a few still unstuffed. 
 bird pattern can be found here


Here's my dirty paint chip from the color we're using in Han's new room.  Her wall color is the last one, Sea Wave.  I was really hesitant about that color until Charles got it on the wall.  Now I love it!  I'd really like to use one of the other two colors for the nursery walls, instead of just having white walls.  The reason I thought that might work is because it'll be a great contrast against the white furniture we'll have in that room, but it'll still look great with the red chair.
valspar colors


I have so many ideas for this room that I have to be careful not to over-do it.  I want it to be cheerful, but simple.

Stay tuned for updates.  We should have this room cleaned out and ready to work on sometime in the next few weeks!


Tuesday, July 26, 2011

While She Was Out... Again - Part One

Just like this same week last year, Han has gone on a beach vacation with a friend. Just like this same week last year, Han is getting a room makeover. Actually, she's getting a new room altogether. We'll be using her current room as the nursery for baby since it's right next to the room that will become the master bedroom. A lot of work for one little baby, huh?

The room that is being transformed for her is what we have been calling "The Cat Room" for the past few years. It's the only spare room in our house, and that's where we've been keeping the litterboxes and cat food/water bowls. It also acts as a dumping ground for any type of home item that I'm not using, but may need one day. Sound familiar???
I know I'm not the only one!

Here are some photos I took last Jan when I was working on
Kicking the Clutter. Although, I got rid of some stuff then, this room actually got much worse than what you see in these photos. I ended up putting all of these Christmas bins in there, and I started putting my pre-makeover Etsy items in there too.

A couple of weeks ago, we began to purge. So many items that still had Goodwill tags on them, went back to Goodwill, and probably 1/4 of my Christmas stuff went there as well. I still need to go back through my "keep" items and purge more. I seem to have kept more than I let go. Do I sound like someone on "Hoarders" or what?

Aside from some furniture painting, purging is about the extent of my involvement in this room. Charles is doing everything else. No painting or heavy lifting for me!

The difference between this makeover and the last is that we won't be finishing this while Han is gone. Turns out while I (and half of the blog world) loved her last room, she didn't. She said that she didn't get to choose anything and it wasn't "her". Grrr, right? This time, I'm letting her choose everything so she can't some to me in six months and say she doesn't like it. I have to admit, this is killin' me, y'all. I know it's her room, and I should let her have a room she loves, but it's driving me crazy!

Here's the paint color she chose. It's a Valspar color called Sea Wave.
I will admit that once Charles got it on the wall, it didn't look bad. I can live with it. Not only do I think I can live with it, I'm actually considering a lighter color from the paint chip card for the nursery.


The problem I have now is the bedding she's chosen. We've already purchased it, but I'm itching to return it.


It totally works with the wall color but, I want to return it because the dresser I'm planning to repaint for her room is a completely different style than the bedding. It's an old Broyhill dresser from the 70's (I think) and it's French Provincial. Here's one someone else made over. The dresser I have only has 6 drawers, but you get the idea.

image courtesy of Rethunk Junk


Not gonna match, right? I'm hoping I can find something a little more feminine that she'll agree with. I know I'm not the only person out there who has struggled with the dilemma of letting a teen design their own room, but wanting it to look good. Have any of you gone through this? How did you handle it? Compromise or give in completely?


Wednesday, July 13, 2011

Yeah, I Got Nothin'

Seriously, guys.  I'm having huge creativity block over here.  My mind is consumed by pregnancy and diabetes (I'm type 2) right now, and the only creative thing I've done lately is some knitting for baby.  Even that's hard since I have no idea what gender this little niblet will be.

I haven't posted in over a week, and believe me, I haven't forgotten about my blog.  I just can't come up with a project to do and blog about.  Well, I should say that I can't come up with a quick project to blog about.  I haven't found the time to work on anything that would take a good amount of time to work on.  I seem to run errands all day and by the time I get home, I'm too tired to do anything.  I can only imagine what life will be like once baby arrives.  I honestly don't know how you guys with multiple small children find the time to do all of the projects you do, AND blog about them.  

Like I said earlier, I have been doing some baby knitting.  Right now, I'm working on making a mobile that will be a mix between these two CUTE mobiles that I found.  I've done the band that goes around the ring and am about to start knitting birds just as soon as I can get a few minutes to sit down. 

*If anyone is interested in these particular mobiles, you can find them here.


Tuesday, July 5, 2011

Oh, Baby!

If I've seemed MIA the past few weeks, it's because I've been working on a new project.
(Charles made these tickets which we included in our dads' Father's Day cards)

That's right, our family of three will become a family of four sometime late next February.  This was a huge surprise for us and we couldn't be more excited.  We have some pretty big adjustments to make as it was only Han and I for the first five years of her life, and then we were joined by Charles about eight years ago.  Han will be 13 when this baby is born.  Long gone are the years of not leaving glasses and other breakables lying around, and not having to be conscious of basically every move we make.  What a difference this baby will make!  It's surreal to think that this time next year, when we have dinner (in or out), there will be another body to fill in the empty space that's always there.

I haven't been pregnant in nearly thirteen years and I can basically say that this feels like my first time being pregnant.  I've found that I don't remember much at all after all of this time.  Some things, I remember once they happen this time around (hello, crazy boobs!).  Mostly, I'm feeling VERY impatient for that sweet babe to get here, just like last time.  I always thought that if I ever did get pregnant again, I wouldn't rush it and would enjoy it.  Yeah right!  ha ha

Lucky for me, we might be practically rearranging our whole house, which will give me something to occupy myself. Yay!

Of course, I wouldn't be myself if I hadn't already started daydreaming about a nursery.  Here are my mood boards so far.  I'm sure this will change 10X over before the time comes to actually do the work.

GIRL:

SOURCES:
1- Fabric - Michael Miller
2 - Artwork by Emily Martin (theblackapple on Etsy)
3 - Fabric - Michael Miller
4 - Artwork by Emily Martin (theblackapple on Etsy)
5 - Fabric - Michael Miller
6 - Artwork by alittlesweetness on Etsy
7 - Artwork by Emily Martin (theblackapple on Etsy)
8 - some sort of white ceramic lamp
10 - Fabric - Michael Miller


BOY:
 
SOURCES:
1- Fabric - Michael Miller
2 - some sort of green ceramic lamp
3 - Fabric - Michael Miller
4 - Artwork - sugarloop on Etsy
5 - Artwork - sugarloop on Etsy
6 - Fabric - Michael Miller
7 - Artwork - sugarloop on Etsy
8 - Artwork - sugarloop on Etsy


Why is it so much easier to plan a girly room?  We're still looking around for what furniture we want to use.  I do know that whatever we get, it'll be white.  I have a big red chair that is in my studio right now, that we'll be using in the nursery.  I think that's why there's so much red on the girl's board.  I'm not sure how red would do with the colors for the boy board, but I guess I could always slipcover it.  Anyway, I'm just rambling now.  I think this will be the only nursery post for a few months.  I still have several months before we get started on it, and I'm not really counting my chickens, even though it kinda seems like it.  I just couldn't help it.  The designer in me just needed to get this out of her system.  Plus, it sure is fun to put those boards together!

Saturday, April 23, 2011

Sconce Wall


* Please ignore the fact that I keep calling these sconces.  I've only just realized that they probably aren't sconces, but since I've been calling them that all week, I'll stick with it.


I posted last Sat about a project I'd started, which was inspired by Nester over at Nesting Place.  I had all intentions of getting this finished and posted by Monday at the latest.  I don't know about y'all, but deadlines never work out for me.  Go figure.

Anyway, I got everything painted and temporarily hung where I wanted them and then decided that I didn't like the two larger wood sconces.  They looked horrible after I painted them and they just didn't play well with the others.  So...  I started over with placement.  I had everything almost in place and was driving a nail in for one of the last pieces on the bottom when the top left sconce fell and knocked all but two pieces down.   Luckily, only one corbel broke.  Still...

I'd like to take a second to mention that this is the point where I gave up trying to do this myself and called in the reinforcements. 

Now that I had someone who always knows how to do things better than I do (seriously), I had to find a way to fill three gaps (the two booted sconces and one broken corbel) in my display which basically meant that I had to find three fillers and then work on placement again.  Thankfully, I have such a big stash that I was able to recover quickly.  I remembered a collection of ornate frames that I'd been working on a couple of months ago.  I'd planned to sell them on Etsy once I finished them.  Of course, I hadn't gotten around to finishing them so there they were.  See, sometimes it pays to be a slacker.  


Anyway, Charles had the brilliant idea of taking a photo of every sconce, corbel and frame and then using Photoshop to work out placement.  Here's the chopped and shopped wall.
 nice, right??? so much simpler than putting 1,000 nail holes in the wall
while trying to work it all out 

After that, it was easy-peasy.  Using the chop-shop photo, I directed while Charles hung everything.  We ended up using anchors and screws so that everything would be more secure.  This basically means that I CANNOT change the layout of these.  heh.


I'm really happy with this tiny slice of wall and I'm soooo glad I'm a collection-type thrifter.  If I start seeing enough of something while I'm out, I'll begin to get them and save 'em up for something.  It really paid off here. 


Linking to:
Think Pink Sunday @ Flamingo Toes
Nifty Thrifty Sunday @ Nifty Thrifty Things 
Hookin' Up With HOH @ House of Hepworths 
Sunday Showcase @ Under the Table and Dreaming 
Sundae Scoop @ i heart naptime 
MMM @ C.R.A.F.T. 
Just Something I Whipped Up @ The Girl Creative 
Amaze Me Monday @ Dittle Dattle 
Motivate Me Monday @ Keeping It Simple 
Met Monday @ Between Naps on the Porch 
Weekend Warrior Link Party @ Ask Anna 
Making the World Cuter Monday @ Making the World Cuter
Mad Skillz Party @ Mad In Crafts 
Paint Projects Link Party @ Centsational Girl
Trash to Treasure Tues @ Sassy Sites  
Get Your Craft On @ Today's Creative Blog 
Tues Link Party @ A Bowl Full of Lemons 
Transformation Thurs @ The Shabby Chic Cottage
Show & Tell Friday @ My Romantic Home
Frugal Friday @ The Shabby Nest